Welcome to the ultimate guide on achieving the perfect smokey eye! Whether you’re a makeup aficionado or a beginner looking to elevate your beauty game, mastering the art of the smokey eye can transform your look from everyday to extraordinary. In this comprehensive guide, we’ll take you through each step with clarity and precision, ensuring that you can confidently create stunning smokey eyes that dazzle.
From selecting the right products to mastering the blending technique, we’ve got you covered. Get ready to unlock the secrets to sultry, seductive eyes that command attention and leave a lasting impression. Let’s dive in and unleash your inner glam goddess!
Steps to Achieving the Perfect Smokey Eye
Step 1: Prep Your Canvas
Before diving into the intricacies of creating a flawless smokey eye, it’s crucial to lay the groundwork for a seamless application. Start by prepping your eyelids with an eyeshadow primer. This step not only helps to create a smooth base for your eyeshadow but also ensures that your makeup stays in place throughout the day or night. The primer acts as a barrier between your skin and the eyeshadow, preventing creasing and fading, and allowing the colors to appear more vibrant.
Additionally, applying a neutral base eyeshadow or concealer helps to even out the skin tone on your lids, providing a blank canvas for the eyeshadow colors to pop. Take your time with this step to ensure that your eyeshadow primer is applied evenly and blended seamlessly for optimal results.
Step 2: Define Your Crease
Defining the crease is a crucial step in creating depth and dimension in your smokey eye look. Choose a transition shade that is slightly darker than your skin tone to add definition to the crease area. Using a fluffy blending brush, gently sweep the transition shade back and forth in the crease, focusing on the outer corner and blending towards the inner corner.
The goal is to create a subtle gradient effect that adds depth to the eyes without overpowering the overall look. Be sure to blend the transition shade seamlessly into the skin to avoid any harsh lines or patchiness. This step sets the foundation for the darker eyeshadows that will be applied later, ensuring a seamless transition between colors for a professional-looking finish.
Also Read : 8 Effective Ways to Prevent Hair Breakage
Step 3: Add Depth with Dark Shadow
Now it’s time to intensify the drama by adding depth and dimension with a dark eyeshadow shade. Choose a color that complements your eye color and desired look, such as charcoal, deep brown, or plum. Using a smaller, denser brush, concentrate the dark eyeshadow on the outer corner of your eyelid, blending it inward towards the center.
Focus the majority of the color on the outer third of the lid, gradually building up the intensity to create a gradient effect. Take your time with this step and use a light hand to avoid applying too much product at once. Remember, it’s easier to add more color than to remove excess, so start with a small amount and build up as needed until you achieve your desired level of depth and intensity.
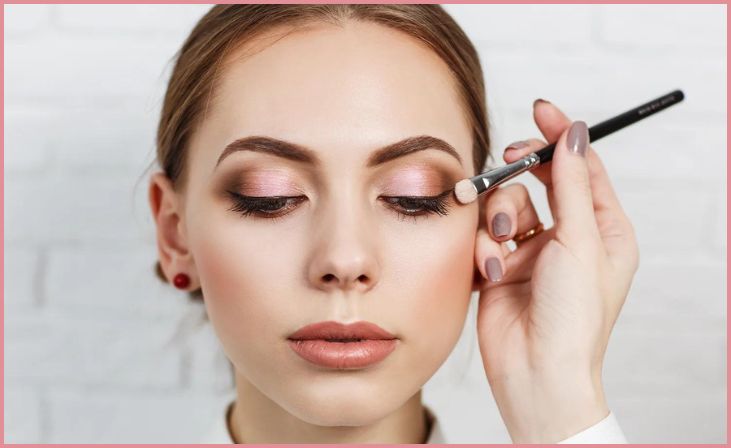
Step 4: Blend, Blend, Blend
The key to a flawless smokey eye lies in the art of blending. Take a clean blending brush and softly diffuse any harsh lines between the transition shade and the dark eyeshadow. Using light, circular motions, blend the colors together until they seamlessly melt into each other, creating a smooth transition from light to dark. Pay special attention to the crease area and outer corner of the eye, as these areas tend to accumulate more color and require extra blending to achieve a seamless finish.
Take your time with this step and continue blending until you achieve the desired level of softness and gradient effect. Remember, blending is the secret weapon to achieving a professional-looking smokey eye, so don’t rush this crucial step.
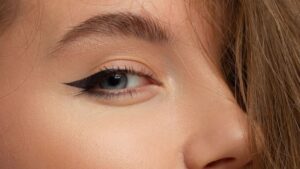
Step 5: Line Your Lashes
Now that you’ve created the perfect base with your eyeshadow, it’s time to define your eyes with eyeliner. Opt for a black or dark brown eyeliner pencil for a classic smokey eye look. Starting at the inner corner of your upper lash line, gently glide the eyeliner pencil along the roots of your lashes, working your way towards the outer corner.
For added intensity and drama, you can also line the lower lash line, focusing on the outer half of the eye to create balance. Once you’ve applied the eyeliner, use a small brush or cotton swab to smudge and soften the line, blending it into the eyeshadow for a seamless transition. This step adds depth and definition to the eyes, enhancing the overall smokey effect and creating a sultry, seductive look.
Step 6: Amp Up the Lashes
No smokey eye look is complete without voluminous lashes to frame and accentuate the eyes. Coat your lashes generously with your favorite lengthening and volumizing mascara, starting at the base of the lashes and wiggling the wand upwards towards the tips. Be sure to coat both the upper and lower lashes for a full, fluttery effect. If you want to take your lash game to the next level, consider adding falsies for extra drama and intensity.
False lashes come in a variety of styles, from natural-looking wispy lashes to bold and dramatic styles, allowing you to customize your look to suit your preferences. Whether you opt for mascara alone or pair it with falsies, lush lashes are the perfect finishing touch to any smokey eye look, adding depth, dimension, and allure to your gaze.
Step 7: Highlight and Brighten
To add the finishing touches to your smokey eye look, apply a shimmery highlight shade to the inner corners of your eyes and brow bone. This step adds brightness and dimension to the eyes, making them appear larger, more awake, and more youthful. Using a small brush or your fingertip, gently dab the highlight shade onto the inner corners of your eyes, blending it slightly onto the lower lash line for a subtle pop of shimmer.
Next, apply the highlight shade to the brow bone, focusing on the highest point of the brow arch to create a lifted and sculpted effect. This step not only enhances the overall look of your smokey eye but also draws attention to your eyes and adds a touch of glamour and sophistication to your makeup look.
Also Read : 8 Benefits of Hot Stone Massage Therapy
Step 8: Finishing Touches

The final step in achieving the perfect smokey eye is to add the finishing touches and ensure that your makeup looks flawless from every angle. Take a moment to assess your makeup look and make any necessary adjustments to ensure that everything is blended seamlessly and evenly. Use a clean makeup brush or cotton swab dipped in makeup remover to clean up any fallout or smudges around the eyes, ensuring a crisp and polished finish.
If desired, you can also apply a setting spray to lock in your makeup and ensure long-lasting wear throughout the day or night. Once you’re satisfied with your smokey eye look, step back and admire your handiwork. You’ve successfully mastered the art of the smokey eye and are ready to showcase your glamorous gaze to the world!
Conclusion
In conclusion, mastering the smokey eye technique opens up a world of endless possibilities for expressing your unique style and enhancing your natural beauty. With the right tools, techniques, and a touch of creativity, anyone can achieve mesmerizing eyes that captivate and allure. Whether you’re preparing for a special occasion or simply want to elevate your everyday makeup routine, the smokey eye is a timeless classic that never fails to make a statement.
Embrace the journey of experimentation and self-expression as you embark on your quest for the perfect smokey eye. Remember, confidence is the key to rocking any look, so wear your smokey eye with pride and let your inner beauty shine through. Here’s to endless possibilities and unforgettable moments with your glamorous gaze!
Frequently Asked Questions
What’s the best way to prevent eyeshadow fallout during smokey eye application?
To minimize fallout and keep your makeup looking pristine, start by tapping off any excess product from your brushes before application. Additionally, consider doing your eye makeup before your face makeup to easily clean up any fallout without disrupting your foundation or concealer.
How can I make my smokey eye last all night without creasing or fading?
Priming your eyelids with a quality eyeshadow primer is essential for long-lasting wear. Additionally, setting your eyeshadow with a translucent setting powder can help lock in color and prevent creasing. Consider investing in a setting spray formulated specifically for the eyes to seal your makeup in place for hours of flawless wear.
Is it necessary to use false lashes for a smokey eye look?
While false lashes can certainly enhance the drama of a smokey eye, they’re not a requirement. You can achieve equally stunning results with just mascara by focusing on volumizing and lengthening your natural lashes. However, if you crave extra glamour or have sparse lashes, false lashes can elevate your look to the next level.